In this post lets get started, with the creation of the ’Issue Alert Workflow’. I will assume that you have SharePoint Designer 2010 downloaded (2007 will workf with PWA 2007 only). SharePoint Designer 2013 can be downloaded for free from: http://www.microsoft.com/download/en/details.aspx?id=16573
Step 1: Create a Project Site
Since we are trying to make this alert part of the Project Site Template, the first step is to create a Site that we can use as a template.
- Navigate to the PWA home page, click on the gear icon, and select Site Contents
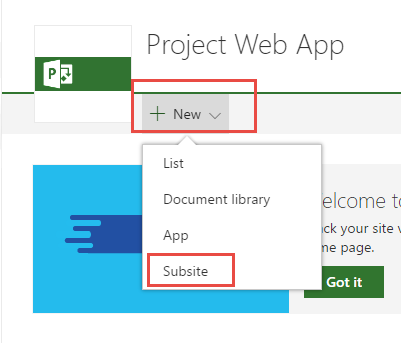
- Now select New >> Subsite
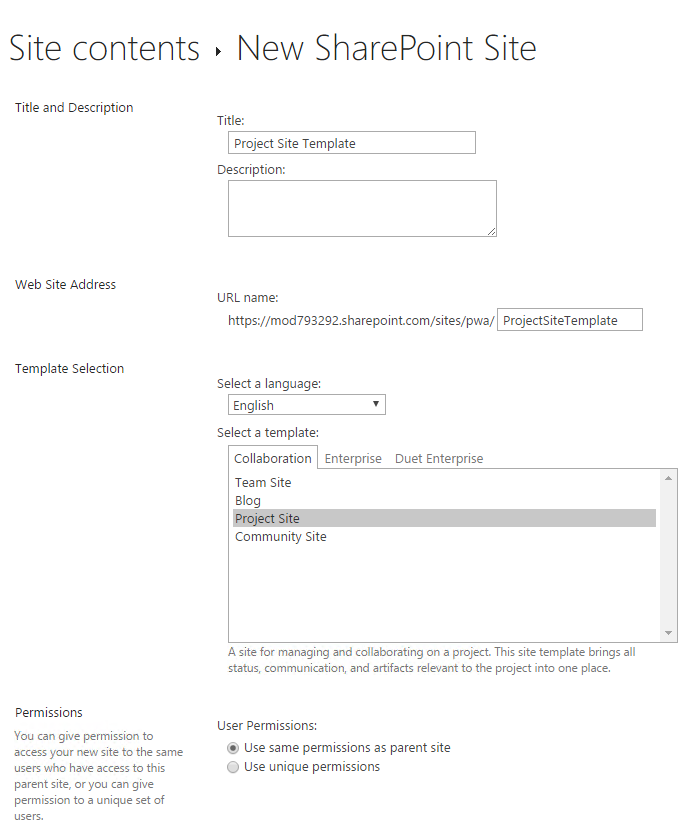
In the Site Creation Dialog Box, select Project Site and give it a name and URL, and click Create.
Step 2: Create the Workflow
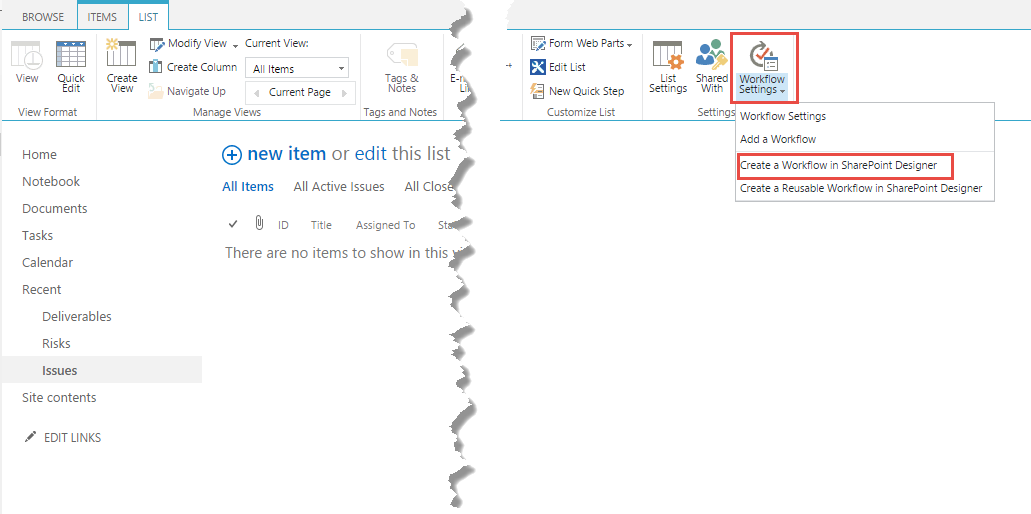
Once your site is created, navigate to the Issues List, click on List on the ribbon, and click on Workflow Settings >> Create a Workflow using SharePoint Designer
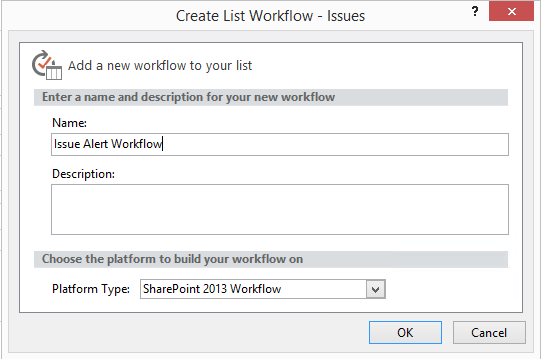
- This will open the site in SharePoint Designer, and dialog box to start creating the workflow. Give it a name and a description.
- Once you hit OK on the previous dialog box, you can start creating the workflow. As you can see in the screenshot below, you can specify a Condition and an Action for your steps of your workflow. Since my goal is to send an email for all ’assigned users’, I will pick a simple condition : If the “person” is a valid SharePoint User and the action : Email these users.
- Click on the word ’Person’ to open the Lookup for the Workflow, (i.e. we need to specify ’who’ the person is).
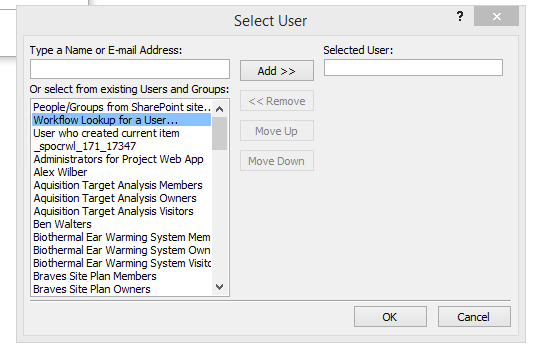
- Click on Workflow Lookup for a User, which brings the pop-up below. Fill the options as shown, and click OK.
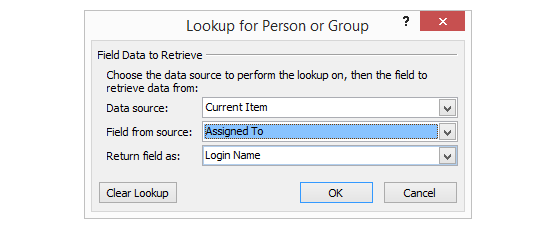
- Next we need to specify which users will get an email, and the context of the email. Click on the ’these users’ , to bring up the Define Email Message box. In the TO box, click on the icon, to bring up the Workflow Lookup again and select the ’Assigned to’ as the receiver of the email. Make sure you select ’Email Address’ as the value returned, and click OK for all boxes.
-

Type a Subject for your email, in the Subject Box. You can use the Workflow Lookup again, to show ’dynamic’ values like name of the Issue, Status and so on.
- In the Content section of the email, you can type the message that you want the email to contain. Again, by using the Workflow Lookup you can add dynamic content that will display the content related to the Issue that the user is assigned to. You can even provide a link to the Issue itself.
- I would recommend reading this article from Microsoft, which provides more details: http://office.microsoft.com/en-us/sharepoint-designer-help/send-e-mail-in-a-workflow-HA010239042.aspx
- Click OK to Save everything.
Step 3: Set the Workflow Settings
The next step is to To set the workflow settings, click on name of the workfflow on the top menu in SPD.
Check the boxes as shown in the diagram, to start the workflow automatically.
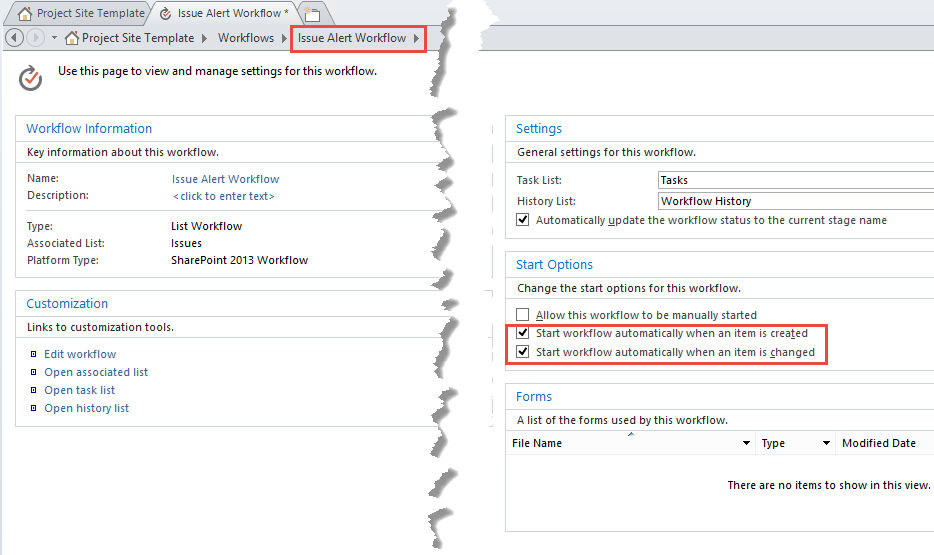
Save the workflow.
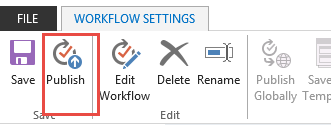
Step 4: Publish the Workflow
Now it is time to ’Publish’ this workflow. Click on Publish from the ribbon.
Once the Publish is complete, the workflow is part of the list.
Go ahead and run some tests to make sure you actually get an email, when an issue is ’created’ or ’changed’.
In my next post, we will see how to save this site as a template, and apply it to an Enterprise Project Type, to make it available for all Project Sites.
November 4, 2016 at 3:25 pm
I’m trying to produce a workflow to notify assigned persons of issue assignment. Just what your post is for, however, some of the images are broken. Can you fix that please? I believe it would be most helpful. Thank you.
December 14, 2016 at 9:08 am
Patti,
Looks like the images were lost during my migration of my blog platform. I will try and update the images using SharePoint 2013. Hope that works for you.